Mary Kelly
There’s something magical about summer gatherings when the sun shines bright and laughter fills the air. Often, these get-togethers revolve around good food. I love to bring desserts that spark joy, and nothing does that quite like a warm slice of raspberry pie.
Imagine it paired with a dollop of homemade whipped cream or a scoop of vanilla ice cream. As tasty as it sounds, it’s also one of those go-to recipes that radiates comfort. Every bite is bursting with nostalgic flavors that remind me of family reunions, and I just can’t get enough!

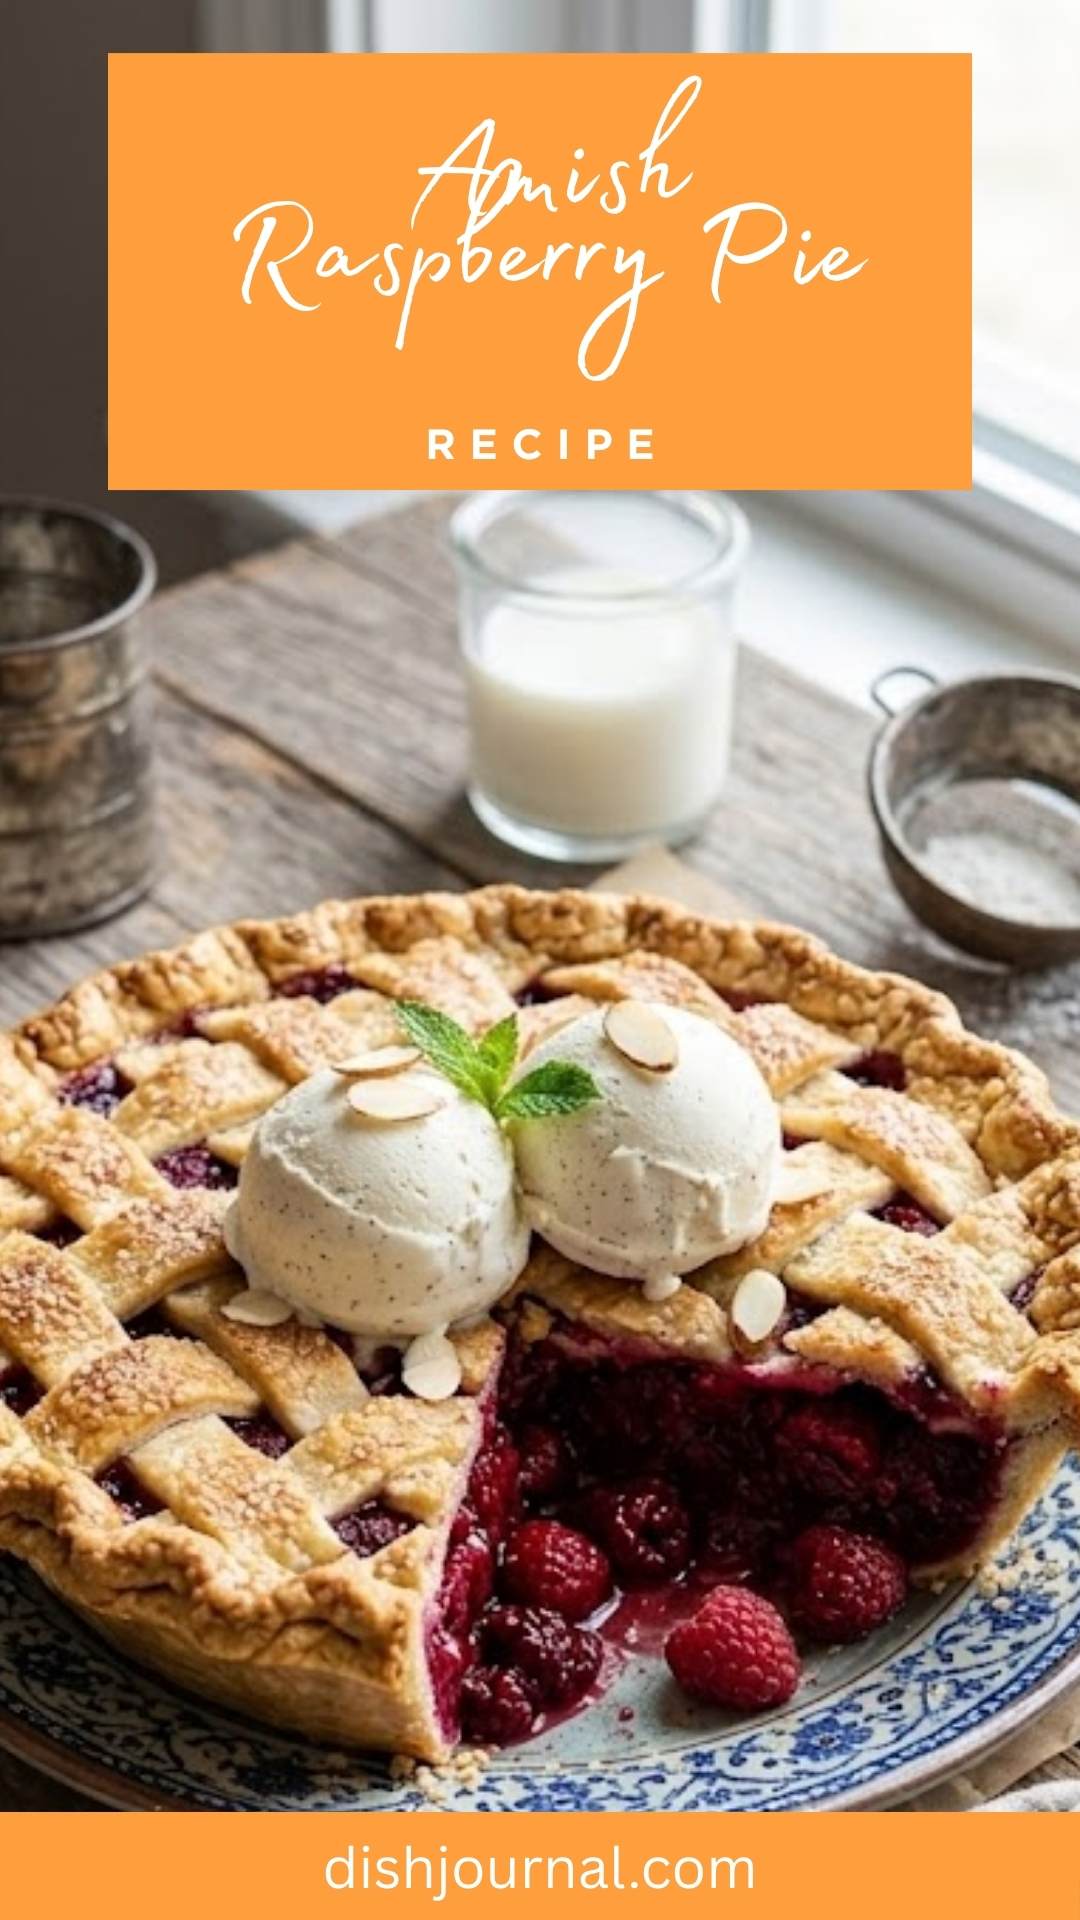
Amish Raspberry Pie is a dish brimming with tradition, fruit, and heartwarming memories. This recipe may have humbly originated from Amish kitchens, but its sweet-tart filling and buttery crumb topping make it a showstopper.
The combination of juicy raspberries and blackberries melded together creates a sweet symphony of flavors that defines summer. Yes, I said “symphony,” but it’s truly a harmonious dance on your taste buds! Plus, this pie is super easy to prepare and perfect for any occasion, from barbecue parties to potluck gatherings.
You Might Like These Recipes!
How I Have Used the Ingredients in This Recipe?
Let’s talk about the ingredients. The beauty of this pie lies in its simplicity and freshness. I use a mix of blackberries and raspberries for their vibrant flavors and textures. Their natural sweetness balances out beautifully with a sprinkle of sugar and a hint of tartness from lemon juice. Tapioca adds that perfect thickening quality to ensure the filling holds together once baked. The crumb topping adds a delightful crunch, making each slice a delightful experience. I’ve also included a touch of nutmeg for that warm, comforting essence that feels just right in a summer dessert.
The Ingredients

Here’s a quick rundown of what you’ll need for this scrumptious Amish Raspberry Pie:
– Pie Crust: Your favorite 9-inch unbaked pie crust
– Pie Filling:
– 3 cups fresh blackberries
– 1 cup fresh raspberries
– 1 cup granulated sugar
– 1 tablespoon lemon juice
– 1 ½ tablespoons minute tapioca
– ¼ teaspoon salt
– ¼ teaspoon ground nutmeg
– Crumb Topping:
– ¾ cup all-purpose flour
– ¼ teaspoon salt
– ⅓ cup butter (or shortening)
– 1 tablespoon butter (to dot over the top of the crumbs)
Ingredients From : amish-heritage.org
How to Make Amish Raspberry Pie Recipe?
Preparing this pie is truly a breeze. It’s all about layering the flavors and baking them until you achieve that gorgeous golden color. You’ll find yourself whipping this pie up time and again, especially as berries come into season. Let’s dive right into the steps.
Step-by-Step Directions
Step 1: Prepare the Crust

If you don’t have a store-bought pie crust handy, you can whip one up easily. I recommend chilling the dough while you prepare the filling. This will keep it flaky, buttery, and ready to hold all that berry goodness.
Step 2: Preheat the Oven

Time to get the oven warmed up! Preheat your oven to 425°F (220°C). A hot oven gives your pie a nice initial burst of heat, ensuring a perfectly baked crust.
Step 3: Combine the Filling

In a mixing bowl, combine the blackberries and raspberries with the sugar, minute tapioca, salt, nutmeg, and lemon juice. Gently stir to combine all the ingredients. Let this mixture rest for about 15 minutes. This pause allows the berries to soften and their juices to meld together, which creates a luscious filling you’ll want to dive right into.
Step 4: Prepare the Crumb Topping

While the fruit sits, grab a small bowl and mix the flour and salt for your crumb topping. Cut in the butter (or shortening) with a pastry blender, breaking it down until you achieve tiny crumbs. This step is crucial for that coveted crumbly texture.
Step 5: Assemble the Pie

Transfer the berry mixture into your prepared unbaked pie crust. Spread it evenly, making sure no berries are left behind. Then, top it generously with the crumb mixture, ensuring every nook and cranny is covered. Finally, dot the top with small bits of butter—this will create a golden crust when it bakes.
Step 6: Bake the Pie

Place your pie on a baking sheet and put it into the preheated oven (at the bottom half). Bake at 425°F for 10 minutes to kickstart that crust. After 10 minutes, lower the oven temperature to 350°F (175°C) and bake for an additional 45-50 minutes. Look for bubbling fruit and a crumb topping that’s golden brown.
Step 7: Finish the Pie
For an extra touch, move your pie closer to the broiler for just a minute or two. This step is optional but provides a lovely finish to the crumbs—watch it closely, as it can burn quickly! Once out of the oven, allow your pie to cool for a bit. The filling will thicken as it cools, which leads to sliceable perfection.
Step 8: Serve
Slice and serve with a scoop of vanilla ice cream or fresh whipped cream. If you’re saving a few slices for later, let the pie cool completely, cover it lightly, and store it in the refrigerator.
Recipe Notes
– Fresh Berries: The fresher, the better! Look for berries that are plump and vibrant, as they’ll provide better flavor.
– Resting Time: Allowing the filling to rest isn’t just a suggestion; it’s key to achieving that perfect berry mash-up.
– Crust: Don’t skip on the crust! A good quality, unbaked crust is essential, whether homemade or store-bought.
– Variations: Feel free to play around! Add a touch of vanilla extract for added depth or mix in a bit of diced peach—fruit blends well!
– Thickening Agent: If you can’t find minute tapioca, cornstarch works well too—just use a bit less since it’s more potent.
Storage Tips
To store your pie, allow it to cool completely before covering it with plastic wrap or aluminum foil. You can refrigerate it for up to four days. If you plan to store it for longer, I recommend slicing it and placing it in an airtight container. Just heat a slice in the microwave for a delightful treat on a busy day.
Serving Suggestions
1. With Vanilla Ice Cream: A classic combination—the creaminess of vanilla ice cream contrasts beautifully with the tartness of the berries.
2. Fresh Whipped Cream: For a lighter option—a dollop of freshly whipped cream enhances the berries’ flavors without overwhelming the pie.
3. Berry Sauce Drizzle: Make a quick berry sauce by puréeing leftover or fresh berries and drizzling it over your slices.
4. Coffee Pairing: Serve with a cup of coffee for an afternoon pick-me-up—raspberry pie and coffee make for a delightful afternoon snack.
5. Pancake Breakfast: Serve a slice between pancakes for a uniquely indulgent breakfast that feels special but is easy to prepare.
What Other Substitutes Can I Use in Amish Raspberry Pie Recipe?
1. Frozen Berries: If fresh berries aren’t available, you can use frozen ones. Just ensure you thaw and drain excess liquid.
2. Cornstarch: For a different thickening agent, cornstarch works well instead of minute tapioca; it just requires slightly less.
3. Maple Syrup: Use maple syrup instead of sugar for a richer flavor that adds a warm twist.
4. Chocolate Crust: For a decadent twist, try using a chocolate cookie crumb crust instead of the classic pie crust.
5. Nutmeg or Ginger: If you prefer a different spice, feel free to use ginger instead of nutmeg for a unique flavor profile.
Amish Raspberry Pie Recipe
Ingredients
Equipment
Method
- If you don’t have a store-bought pie crust handy, you can whip one up easily. I recommend chilling the dough while you prepare the filling. This will keep it flaky, buttery, and ready to hold all that berry goodness.
- Time to get the oven warmed up! Preheat your oven to 425°F (220°C). A hot oven gives your pie a nice initial burst of heat, ensuring a perfectly baked crust.
- In a mixing bowl, combine the blackberries and raspberries with the sugar, minute tapioca, salt, nutmeg, and lemon juice. Gently stir to combine all the ingredients. Let this mixture rest for about 15 minutes. This pause allows the berries to soften and their juices to meld together, which creates a luscious filling you’ll want to dive right into.
- While the fruit sits, grab a small bowl and mix the flour and salt for your crumb topping. Cut in the butter (or shortening) with a pastry blender, breaking it down until you achieve tiny crumbs. This step is crucial for that coveted crumbly texture.
- Transfer the berry mixture into your prepared unbaked pie crust. Spread it evenly, making sure no berries are left behind. Then, top it generously with the crumb mixture, ensuring every nook and cranny is covered. Finally, dot the top with small bits of butter—this will create a golden crust when it bakes.
- Place your pie on a baking sheet and put it into the preheated oven (at the bottom half). Bake at 425°F for 10 minutes to kickstart that crust. After 10 minutes, lower the oven temperature to 350°F (175°C) and bake for an additional 45-50 minutes. Look for bubbling fruit and a crumb topping that’s golden brown.
- For an extra touch, move your pie closer to the broiler for just a minute or two. This step is optional but provides a lovely finish to the crumbs—watch it closely, as it can burn quickly! Once out of the oven, allow your pie to cool for a bit. The filling will thicken as it cools, which leads to sliceable perfection.
- Slice and serve with a scoop of vanilla ice cream or fresh whipped cream. If you’re saving a few slices for later, let the pie cool completely, cover it lightly, and store it in the refrigerator.
Notes
Tried this recipe?
Let us know how it was!FAQs
What is minute tapioca, and can I substitute it?
Minute tapioca is a pre-cooked version of tapioca starch that thickens fillings. If you don’t have it, cornstarch can be a good substitute, just use it in slightly lesser amounts.
Can I use other fruits in this pie?
Absolutely! While the combination of blackberries and raspberries is traditional, peaches, blueberries, and cherries work beautifully in this recipe as well.
How do I prevent a soggy bottom crust?
To avoid a soggy crust, pre-bake the crust for about 5-7 minutes before adding the filling. This ensures it has a chance to cook before all the moisture from the filling seeps in.
Is this pie gluten-free?
If you use a gluten-free pie crust and replace the flour in the crumb topping with a gluten-free alternative, this pie can easily be made gluten-free.
How can I make this pie less sweet?
You can reduce the amount of sugar in the filling to your taste. Alternatively, using tart berries balances sweetness without needing as much sugar.
Conclusion
There’s something undeniably charming about Amish Raspberry Pie. It encapsulates the essence of summer with its vibrant berries and crumbly topping. This recipe is straightforward enough that you can whip it up for a casual gathering, yet delicious enough for special occasions. Whether enjoyed warm or chilled, each slice is a treat that invites nostalgia and happy moments around the table.
So, what are you waiting for? Grab those summer berries and start baking—your taste buds will thank you!