Mary Kelly
You know those lazy Sunday afternoons when the air is crisp, and all you want is a slice of warm apple pie? That’s exactly how I feel about this apple pie butter recipe. It evokes memories of family gatherings and cozy firesides with steaming mugs of cider.
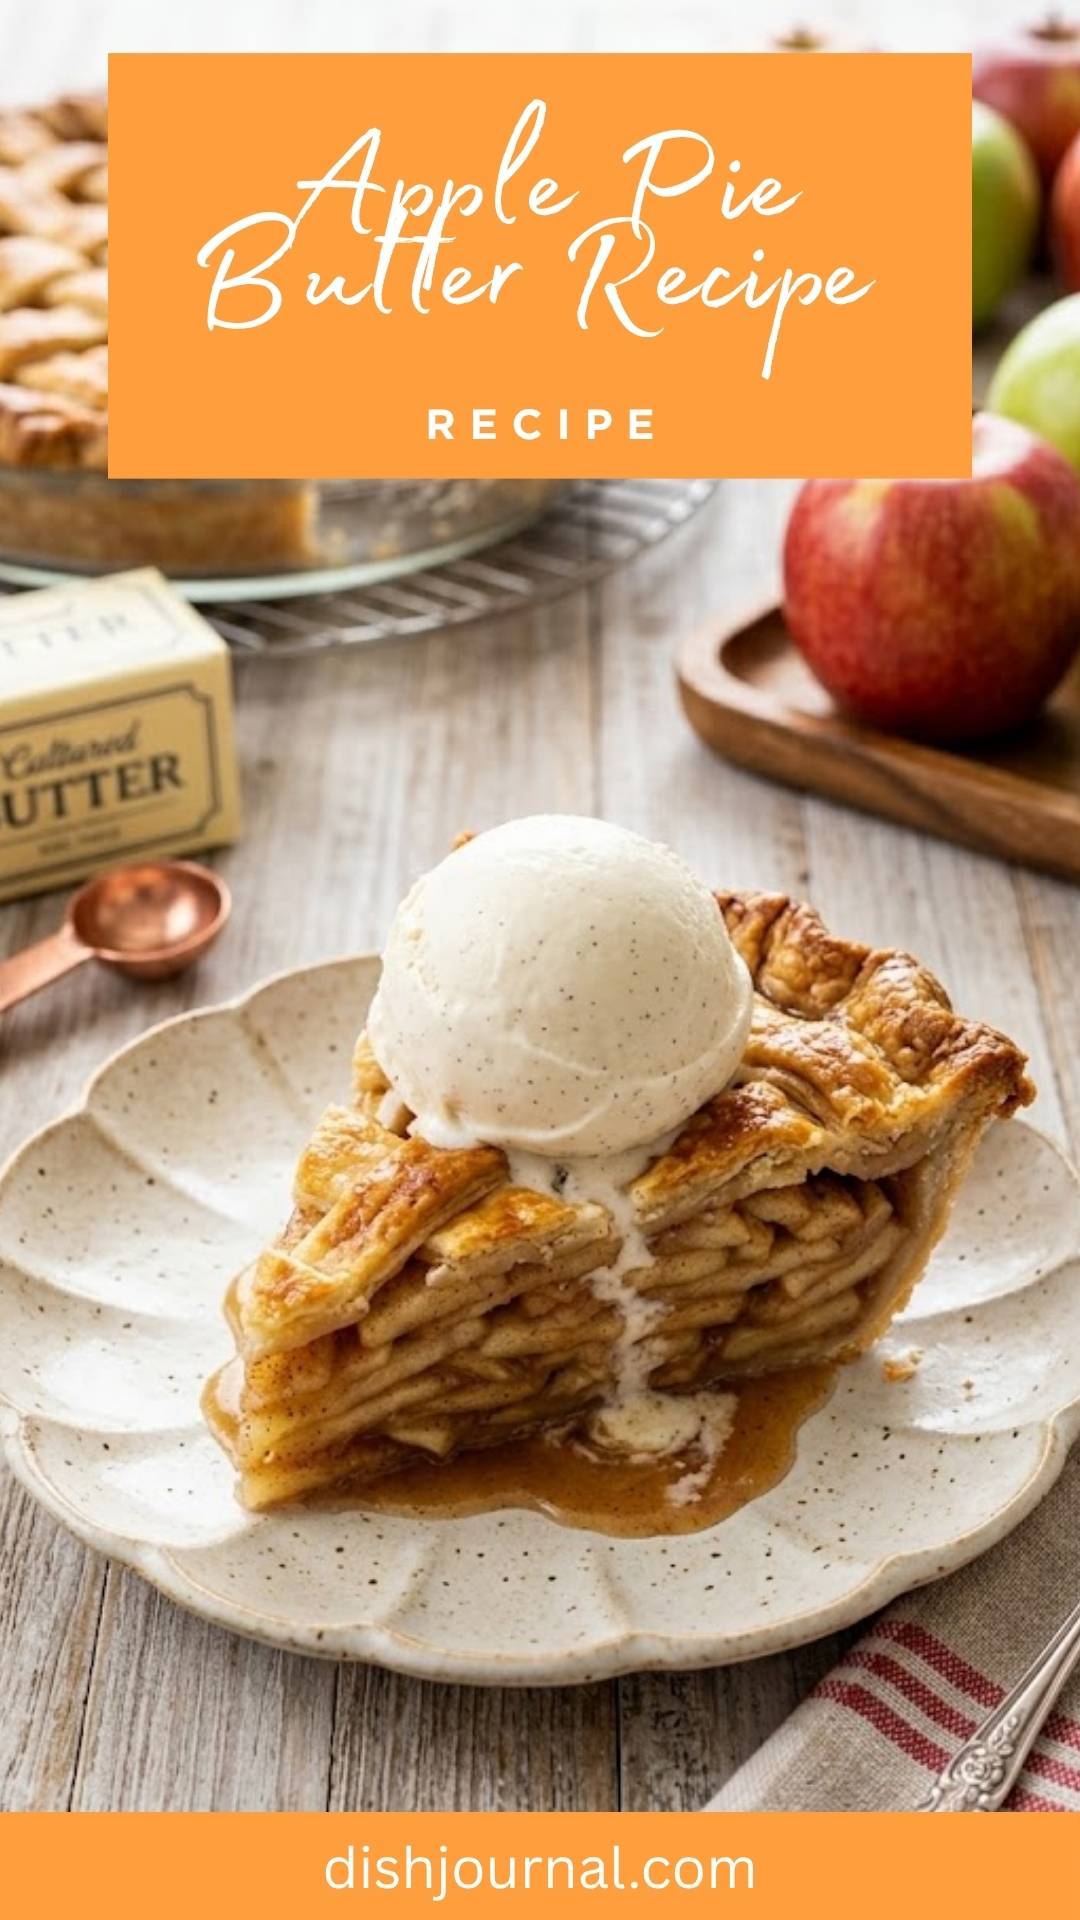
Serve it up with vanilla ice cream melting on top or a dollop of whipped cream, and you’ve got a dessert that brings warmth and smiles to your table.

The art of making pie has been passed down through generations, and apple pie remains a beloved staple. This recipe for apple pie butter combines wholesome ingredients to showcase the natural sweetness and flavor of apples.
You’ll end up with a dessert that celebrates simplicity while reminding you of grandma’s kitchen.
You Might Like These Recipes!
What is apple pie butter recipe?
Apple pie butter is a sweet spread made from cooked down apples, sugar, and spices, reminiscent of the classic filling found in apple pie. It’s thicker than a sauce but smoother than a jam, perfect for slathering on toast or adding to desserts. Essentially, it captures the essence of apple pie in a jar—a true comfort food.
What is the flavor profile of this dish?
Expect a delightful balance of sweet and spiced flavors! With the richness of the apples often paired with cinnamon, allspice, and nutmeg, each bite is a cozy explosion reminiscent of fall. The hint of lemon brightens the dish, rounding out the flavors beautifully. Whether used as a topping or spread, the taste is undeniably comforting.
Why You’ll Love this dish?
You’ll love this apple pie butter for its adaptability. It’s an excellent way to use up apples during harvest season, and you can spread it on almost anything for a delightful flavor boost. Plus, it brings the nostalgia of apple pie without needing to roll out a full crust. It’s pure magic in a jar!
The Ingredients

Here’s what you’ll need to create this delicious apple pie butter:
– For the pie crust:
– Homemade Pie Crust or All Butter Pie Crust (both recipes yield enough for top and bottom crusts)
– 10 cups (1250g) thick apple slices, about 8 large peeled and cored apples
– 1/2 cup (100g) granulated sugar (or packed brown sugar for depth of flavor)
– 1/4 cup (31g) all-purpose flour
– 1 Tablespoon (15ml) lemon juice (for brightness)
– 1 and 1/2 teaspoons ground cinnamon
– 1/4 teaspoon ground allspice
– 1/4 teaspoon ground nutmeg
– 1/4 teaspoon vanilla extract (optional, for extra warmth)
– Egg wash: 1 large egg beaten with 1 Tablespoon (15ml) milk
– Optional: coarse sugar for sprinkling on the crust
Ingredients From : sallysbakingaddiction.com
How to make apple pie butter recipe?
Making apple pie butter is straightforward and totally rewarding. Prepping the crust and filling takes a little time, but the end product—warm, spiced apple goodness—is totally worth it. Here’s how you can whip it up.
Step-by-step directions
Step 1: Prepare Your Pie Crust

Begin by choosing either your homemade pie crust or the all-butter pie crust. Whichever you choose, follow the recipe through to step 5. Once your dough is ready, pop it in the fridge for at least two hours. This helps firm it up which makes rolling it out much easier.
Step 2: Roll Out the Dough

Once the dough is sufficiently chilled, sprinkle some flour on your work surface. Take one disc of dough and roll it out into a circle, making sure to turn it a quarter turn every few rolls. Aim for about a 12-inch diameter so it fits your pie dish.
Step 3: Assemble the Bottom Crust

Carefully lay the rolled-out dough into a 9-inch pie dish that’s about 1.5 to 2 inches deep. Tuck in the edges, smoothing out any bumps. Keep this crust cool in the fridge while you tackle the filling.
Step 4: Make the Filling

In a large mixing bowl, combine your apple slices, sugar, flour, lemon juice, cinnamon, allspice, nutmeg, and your optional hint of vanilla. Stir everything together so the apples are coated evenly. This creates that delightful filling we all love!
Step 5: Optional Pre-Cooking of Apples

If you have the time, pour your filling mixture into a large skillet or Dutch oven. Cook over medium heat for about five minutes, stirring gently until the apples start to soften. This step isn’t essential, but it can enhance the flavor and texture, resulting in a juicier, more flavorful pie.
Step 6: Spoon in Your Filling

Preheat your oven to 400°F (204°C). Once preheated, carefully spoon the apple filling into your prepared crust. It may seem like a mountain of apples, but that’s essential—pile them high!
Step 7: Prepare the Top Crust
Retrieve the second disc of pie dough from the refrigerator. Roll it out into another 12-inch circle. Using a sharp knife or a pizza cutter, cut the dough into strips approximately one inch wide.
Step 8: Create the Lattice
To create lattice work, weave the strips over and under one another, adjusting as necessary. Your goal is a lovely crisscross pattern to allow those juices to bubble up while baking.
Step 9: Final Touches
Trim any excess dough and fold the edges inward. Pinch the top and bottom crusts together firmly. You can flute or crimp the edges for flair! Brush an egg wash over the top crust and sprinkle with coarse sugar if you like a little crunch.
Step 10: Bake Away!
Chill your pie in the refrigerator for 20 to 30 minutes to help it hold its shape during baking. Place it in the oven on the middle rack for 25 minutes. To catch any juices escaping, set a baking sheet on the bottom rack. After 25 minutes, lower the temperature to 375°F (190°C) without removing the pie and cover the edges with a pie crust shield or foil to prevent burning. Continue to bake for an additional 35 to 45 minutes, until the filling is bubbling, and the crust is beautifully golden.
Step 11: Cooling Time
Once you remove the pie from the oven, leave it to cool on a wire rack for at least three hours before slicing. This helps the filling set, allowing for cleaner slices.
Tips
– Use a mix of apples for depth in flavor—Granny Smith for tartness and Honeycrisp for sweetness work beautifully.
– If you run short on time, store-bought pie crust works just fine too.
– Remember to let the pie cool completely to avoid a soupy slice when cutting.
– Experiment with spices, like adding a bit of ginger or cardamom if you’re feeling adventurous.
– Don’t skimp on the egg wash; it gives the crust that beautiful golden color.
How Can You Store This apple pie butter recipe?
To store your apple pie butter, let it cool completely before transferring it to an airtight container. It can be kept in the refrigerator for up to five days. If you want to keep it longer, consider freezing portions! Place it in freezer-safe containers or bags for up to three months. Just thaw in the fridge overnight before using.
If some of the ingredients are not available in your pantry, what are some alternative choices you can consider?
– Sugar: Try honey or maple syrup as natural sweetener alternatives—just adjust for sweetness.
– All-purpose flour: For a gluten-free option, use almond flour or a gluten-free flour blend.
– Lemon juice: Apple cider vinegar can also brighten the flavors if you’re out of lemon.
– Ground cinnamon: If you have a spice blend like Pumpkin Spice on hand, it can work wonders for a unique twist!
– Butter for the crust: Substitute with coconut oil for a dairy-free version.
Serving Suggestions
– Classic vanilla ice cream on top or on the side for that creamy contrast.
– Whipped cream sunglowing over each slice.
– Sweet graham crackers for dipping.
– Oatmeal breakfast bowls can get a delightful boost with a spoonful of this pie butter.
– Pair it with your morning toast for a sweet start to your day.
What other substitutes can I use in apple pie butter recipe?
– Chickpea flour can replace regular flour in the crust.
– Coconut sugar is an excellent alternative for brown sugar.
– Dried fruits like raisins or cranberries can add a chewy element to the filling.
– Nutmeg can be swapped out for a hint of cinnamon if you prefer.
– Use hazelnuts or walnuts in the crust for added crunch and flavor.
Apple Pie Butter Recipe
Ingredients
Equipment
Method
- Begin by choosing either your homemade pie crust or the all-butter pie crust. Whichever you choose, follow the recipe through to step 5. Once your dough is ready, pop it in the fridge for at least two hours. This helps firm it up which makes rolling it out much easier.
- Once the dough is sufficiently chilled, sprinkle some flour on your work surface. Take one disc of dough and roll it out into a circle, making sure to turn it a quarter turn every few rolls. Aim for about a 12-inch diameter so it fits your pie dish.
- Carefully lay the rolled-out dough into a 9-inch pie dish that’s about 1.5 to 2 inches deep. Tuck in the edges, smoothing out any bumps. Keep this crust cool in the fridge while you tackle the filling.
- In a large mixing bowl, combine your apple slices, sugar, flour, lemon juice, cinnamon, allspice, nutmeg, and your optional hint of vanilla. Stir everything together so the apples are coated evenly. This creates that delightful filling we all love!
- If you have the time, pour your filling mixture into a large skillet or Dutch oven. Cook over medium heat for about five minutes, stirring gently until the apples start to soften. This step isn’t essential, but it can enhance the flavor and texture, resulting in a juicier, more flavorful pie.
- Preheat your oven to 400°F (204°C). Once preheated, carefully spoon the apple filling into your prepared crust. It may seem like a mountain of apples, but that’s essential—pile them high!
- Retrieve the second disc of pie dough from the refrigerator. Roll it out into another 12-inch circle. Using a sharp knife or a pizza cutter, cut the dough into strips approximately one inch wide.
- To create lattice work, weave the strips over and under one another, adjusting as necessary. Your goal is a lovely crisscross pattern to allow those juices to bubble up while baking.
- Trim any excess dough and fold the edges inward. Pinch the top and bottom crusts together firmly. You can flute or crimp the edges for flair! Brush an egg wash over the top crust and sprinkle with coarse sugar if you like a little crunch.
- Chill your pie in the refrigerator for 20 to 30 minutes to help it hold its shape during baking. Place it in the oven on the middle rack for 25 minutes. To catch any juices escaping, set a baking sheet on the bottom rack. After 25 minutes, lower the temperature to 375°F (190°C) without removing the pie and cover the edges with a pie crust shield or foil to prevent burning. Continue to bake for an additional 35 to 45 minutes, until the filling is bubbling, and the crust is beautifully golden.
- Once you remove the pie from the oven, leave it to cool on a wire rack for at least three hours before slicing. This helps the filling set, allowing for cleaner slices.
Notes
Tried this recipe?
Let us know how it was!FAQs
1. Can I use other fruits besides apples?
Absolutely! Pears or peaches can be delicious substitutes. Just keep in mind their moisture levels may differ.
2. What if my pie crust cracks?
If cracks develop while baking, don’t fret! Use a little extra egg wash to patch it. It’s a homemade pie—imperfections can be beautiful.
3. How do I prevent my pie from getting soggy?
Make sure to pre-cook your apple filling slightly, as it helps reduce moisture, and let the pie cool completely before slicing.
4. Can I make classic piecutter designs on top?
Sure! You can cut designs into the top crust if you’d like; it just adds a personalized touch.
5. What can I do with leftover apple pie butter?
Use it on pancakes, in yogurt, or as an ingredient in oatmeal cookies for added sweetness and flavor.
Conclusion
In creating this apple pie butter recipe, you’ll not only satisfy those cravings for pie but also harness the comforts of a traditional dish in a new, convenient form. Whether you serve it up at a gathering or relish it solo in your cozy nook, each serving promises warmth and joy.
Embrace the nostalgia, enjoy the process, and treat your loved ones to a little taste of homemade goodness. Happy baking!