Ingredients
Method
Step 1: Cook Your Bacon and Prepare Your Workspace
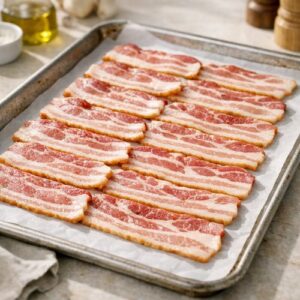
- Start by laying 16 slices of applewood bacon on a large sheet pan lined with parchment paper. This creates zero cleanup for the bacon component—no splashing grease, no pan scrubbing. Bake at 400°F for 18-20 minutes until it's crispy but not brittle. While the bacon cooks, gather all your ingredients and assemble them in order of use. Pull out eight storage containers and label them immediately with the date and contents. Don't wait until after cooking; this takes 90 seconds now and prevents you from doing it while tired. Once the bacon is done, transfer it to a paper towel-lined plate and let it cool completely. This takes about 8 minutes. Once cooled, crumble it into small pieces and set aside in a small bowl. The bacon loses no quality sitting for an hour and actually keeps better in a separate container than embedded in the finished burger.
Step 2: Brown Your Ground Beef with Strategic Seasoning
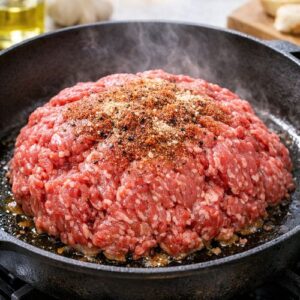
- Add 3 pounds of ground beef chuck to a large skillet or Dutch oven over medium-high heat. Don't break it up immediately—let it sit undisturbed for 3 minutes to develop proper browning and deeper flavor. Then break it into crumbles and continue cooking, stirring occasionally, until no pink remains. This takes about 8-10 minutes total. Drain excess fat, reserving about 2 tablespoons in the pan for flavor. Once the beef is cooked through, add 2 teaspoons kosher salt, 1 teaspoon black pepper, and 2 teaspoons taco seasoning. Stir thoroughly to distribute the seasonings evenly. Let this sit off heat for 2 minutes—this allows the flavors to set rather than cooking off immediately. The beef should smell noticeably more complex than when you started.
Step 3: Mix Your Cooling Cream Base
- In a medium bowl, whisk together 1 cup sour cream, 1 cup ranch dressing, ½ cup salsa, juice from half your lime, and a pinch of cilantro if using. Make this 15 minutes before assembly so the flavors have time to meld. Taste and adjust seasoning—you want it slightly brighter than the ranch alone but still creamy and mild. This mixture holds beautifully for the entire week and actually tastes better after a day of flavors settling. Transfer this to a separate container and refrigerate until assembly time. This prevents you from having to make this component later and ensures maximum flavor development.

Step 4: Warm Your Tortillas and Set Up Your Assembly Station
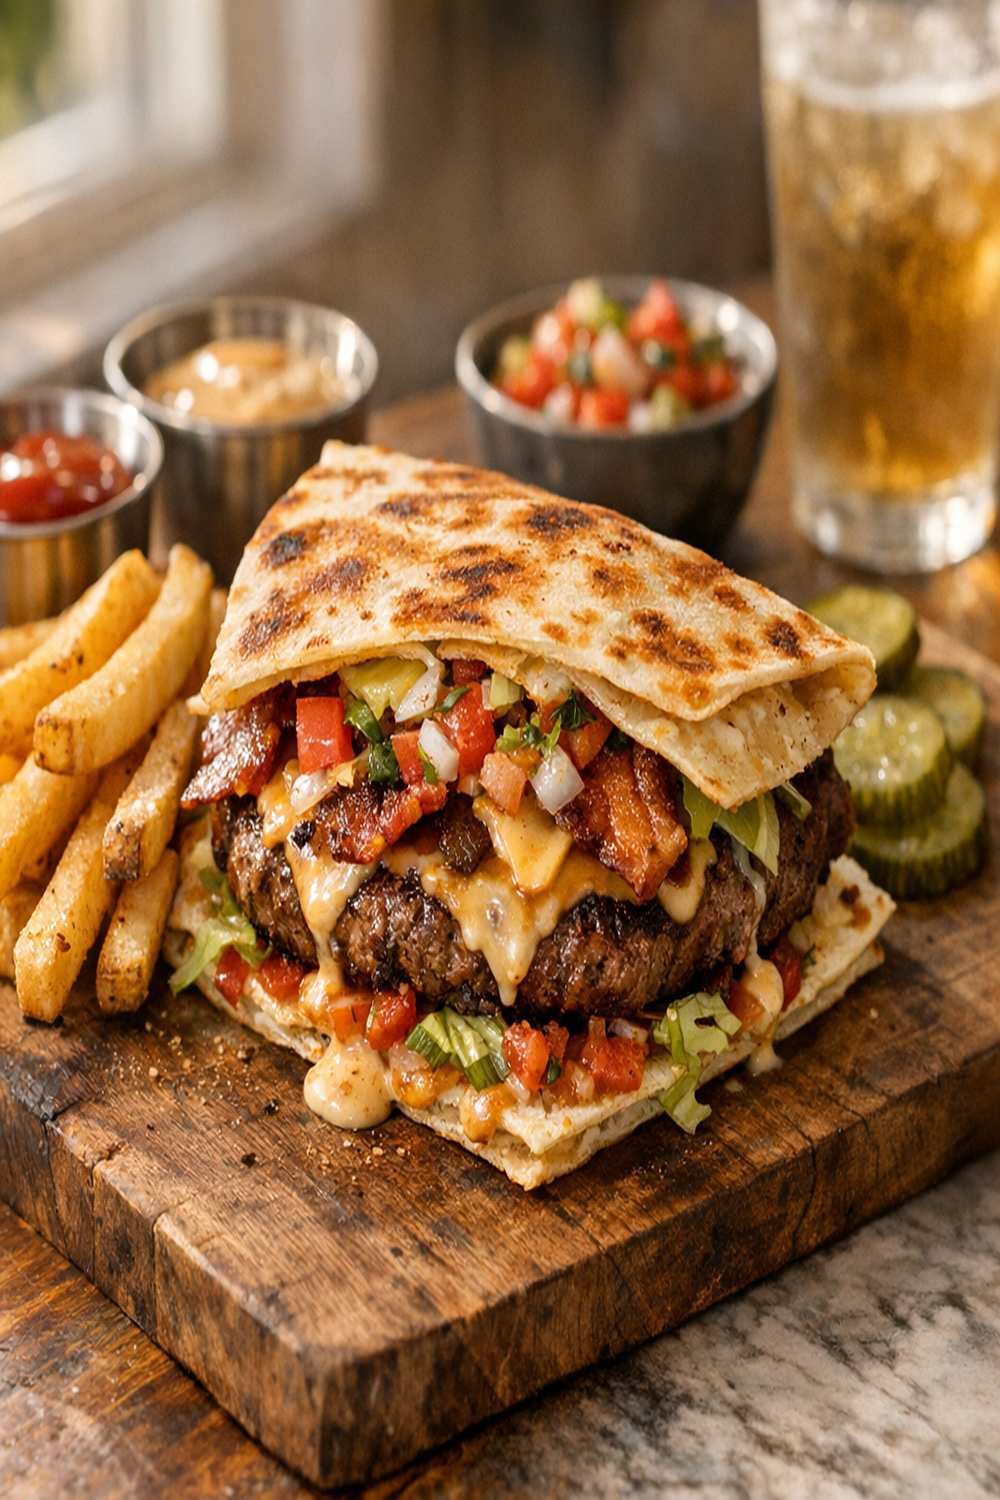
- Wrap your 16 corn tortillas in a damp paper towel and microwave them for 60 seconds. This makes them pliable and much easier to work with—cold tortillas crack and are genuinely frustrating to assemble. Set them on your workspace in a stack covered with the paper towel to keep them warm. Now arrange your workspace like a professional assembly line. Left to right: warm tortillas, cooked beef, pepper jack slices, cheddar cheese, bacon crumbles, pico de gallo, lettuce, and the cooling cream mixture in small bowls for easy scooping. This setup takes 3 minutes and prevents you from hunting for ingredients while your hands are full of beef.

Step 5: Assemble Your Quesadilla Burgers Using the Two-Tortilla Method
- Here's where technique matters. Lay one warm tortilla flat on your workspace. Add approximately 3 ounces of cooked seasoned beef in the center (about the size of a hockey puck). Top this with one slice of pepper jack cheese and one slice of sharp cheddar cheese. These two cheeses together create the perfect melting ratio—the pepper jack adds spice and complexity while the cheddar adds richness and familiarity. Now top with approximately 1 tablespoon of bacon crumbles, 2 tablespoons of pico de gallo, and ¼ cup of the crisp lettuce. Add a tablespoon of the cooling cream mixture directly on top. Now here's the assembly secret: place a second tortilla on top and press down gently to seal everything together. This creates a self-contained package that's actually portable and genuinely delicious to eat. Repeat this process seven more times. You're making eight complete burgers in this batch. Set each finished burger aside on a clean cutting board as you go. This entire assembly process takes approximately 12 minutes once you have your station set up properly.

Step 6: Cut and Container Your Burgers for Maximum Freshness
- Once all eight are assembled, cut each burger diagonally from corner to corner. This creates two triangular pieces that are easier to handle, look more appealing, and expose more of the gorgeous filling. This is a restaurant technique that makes homemade food feel special. Place each pair of triangular halves into individual containers with parchment paper between them—this prevents them from sticking together and keeps them looking fresh. Add a small container of the remaining cooling cream mixture on the side of each container, and a separate small container with extra pico de gallo and lettuce. This allows you to customize freshness throughout the week. Seal all containers immediately and refrigerate. Label with the date prepared and the date by which it should be consumed (five days from today). This labeling system takes 90 seconds and eliminates any guessing about freshness.