Mary Kelly
I understand what it feels like to stare into your refrigerator on Wednesday night, exhausted and hungry, knowing you need something satisfying but lacking the energy to cook. This is exactly why I fell in love with strategic meal prep—and why this Applebee’s Quesadilla Burger recipe has become my secret weapon for taking control of my entire week. Make this once on Sunday, and you’ll have restaurant-quality handheld meals ready to grab before work, pack for lunch, or reheat for a quick dinner when life gets hectic. Just like my grandmother taught me that good food doesn’t require hours at the stove, smart meal preparation proves you can eat beautifully without sacrificing your sanity.
Applebee’s Quesadilla Burger Recipe Meal Prep: Cook Once, Eat All Week
I discovered meal prep as a life-changing strategy during my first year as a registered dietitian, when I was working long clinical hours and falling into the trap of drive-through dinners. One Sunday afternoon, I decided to recreate my favorite restaurant burger at home—that unforgettable Applebee’s version with the crispy tortilla exterior, melted cheese, smoky bacon, and zesty toppings. But instead of making just two burgers, I made eight. As I wrapped each one individually and labeled the containers, something shifted in my thinking. This wasn’t just about having leftovers; this was about reclaiming my relationship with food and my own health.
That single batch of quesadilla burgers lasted me four different meals throughout the week. Monday was the classic presentation with fresh lettuce and pico de gallo. By Wednesday, I’d deconstructed them into salad bowls. Friday morning, the last two became breakfast-inspired sandwiches with a fried egg. What started as a practical solution became my favorite proof that intentional cooking compounds into real freedom.
Why This Recipe Is Perfect for Meal Prep
- Saves 45 minutes daily across your week – No cooking Monday through Friday means you reclaim nearly 4 hours of your life. That’s time for movement, rest, or connection instead of standing over a stove.
- Maintains structural integrity for 5 full days – Unlike delicate items, these sturdy handheld burgers hold up beautifully through refrigeration. The tortilla wrapper stays pliable, the cheese doesn’t separate, and the beef remains tender and flavorful even on day five.
- Transforms into 4 completely different meals from one batch – This versatility prevents the soul-crushing boredom that makes people abandon meal prep. Same base ingredients, completely different presentations throughout your week.
- Requires minimal equipment and one efficient cooking session – Brown your beef once, assemble everything at the same time, and you’re done. No juggling multiple pans or timing obstacles.
- Protein-forward nutrition that keeps you satisfied through busy days – At approximately 28 grams of protein per burger, these keep hunger at bay and energy stable, making them ideal for anyone managing demanding schedules.
Your Weekly Meal Plan With This Recipe
Here’s exactly how I transform one batch of eight quesadilla burgers into four distinct meals that don’t feel repetitive. This is where meal prep stops being monotonous and starts being genuinely exciting.
- Monday Lunch: Classic Quesadilla Burger Bowl – Serve the burger whole or deconstructed over crisp iceberg lettuce with fresh pico de gallo, a dollop of the cooling cream blend, and extra pepper jack cheese. This is the most restaurant-faithful presentation and the first impression should be your strongest.
- Wednesday Dinner: Loaded Quesadilla Burger Salad – Crumble the burger over mixed greens, top with crispy bacon pieces (doubled from your batch), all the fresh toppings, and drizzle with the cream mixture as your dressing. You’re using the same ingredients but creating an entirely different eating experience.
- Thursday Breakfast: Breakfast Quesadilla Burger with Egg – Reheat the burger gently, top with a fried or scrambled egg, and wrap it back in a warm tortilla. This transforms dinner into a protein-packed breakfast that has absolutely no reason to feel strange—it works beautifully and keeps you satisfied through a busy morning.
- Friday Lunch: Deconstructed Quesadilla Burger Plate – Crumble the burger, arrange all components separately on a plate with extra lime wedges and hot sauce on the side. Let people at your office ask what smells so incredible while you enjoy restaurant-quality food from your meal prep container.
The Ingredients – Scaled for a Full Week
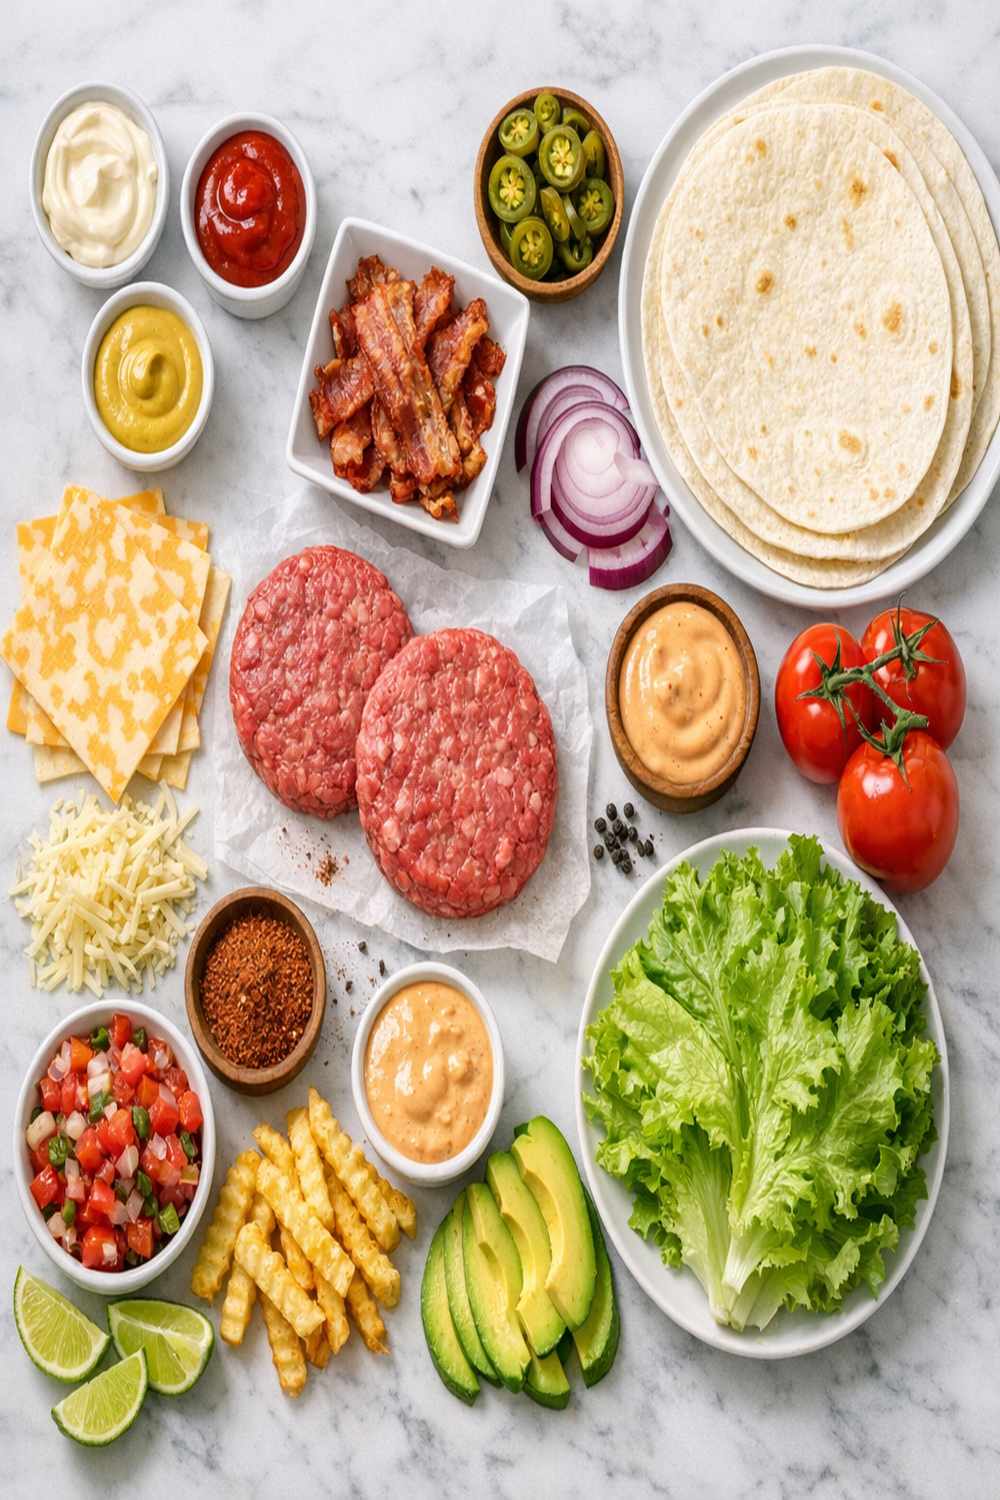
This ingredient list is scaled for eight complete quesadilla burgers—exactly one week’s worth of lunches or dinners. I’ve grouped everything strategically so you can see exactly what you’re working with and how each component contributes to the final result.
For the Protein and Assembly Base
- 16 slices pepper jack cheese (or 2 cups shredded; slices work better for even melting during assembly)
- 1 pound applewood-smoked bacon (cooked until crisp, then crumbled; this is about 16 slices when you buy it packaged)
- 2 teaspoons kosher salt (dissolved into the beef for even seasoning throughout)
- 16 small corn tortillas (street taco size, approximately 6 inches—these are sturdier than flour and add authentic flavor)
- 3 pounds ground beef chuck (80/20 blend with enough fat to stay juicy, not lean which dries out)
- 1 teaspoon freshly ground black pepper (added after browning, not before, to prevent bitterness)
For the Cooling Cream Mixture and Toppings
- 3 cups shredded sharp cheddar cheese (aged for more flavor; this adds a second cheese layer that makes these special)
- ½ cup fresh salsa (chunky style with visible tomato and onion, not the smooth versions)
- 2 tablespoons fresh cilantro (optional, but adds genuine brightness if you have it on hand)
- 1 lime (for juice to brighten the sour cream mixture)
- 1 cup full-fat sour cream (the quality ingredient here; don’t substitute Greek yogurt which breaks down)
- 2 teaspoons taco seasoning (homemade blend of cumin, chili powder, garlic powder, or store-bought—both work equally well)
- 1 cup traditional ranch dressing (store-bought is fine; homemade if you have time, but store-bought works beautifully)
- 4 cups shredded iceberg lettuce (crisp and cold; saves this refrigerated until assembly time)
- 1½ cups pico de gallo (fresh-made or quality store-bought; the fresh tomato component that brightens everything)
The Meal Prep Process: How to Make Applebee’s Quesadilla Burger Recipe in Bulk
This isn’t just assembly-line cooking—it’s a systematic approach to creating restaurant-quality food in your own kitchen. I’ve broken this into logical steps that minimize cleanup and maximize efficiency. You’ll move through each station, completing one task fully before moving to the next. This is how professional kitchens work, and it’s exactly how you should approach meal prep at home.
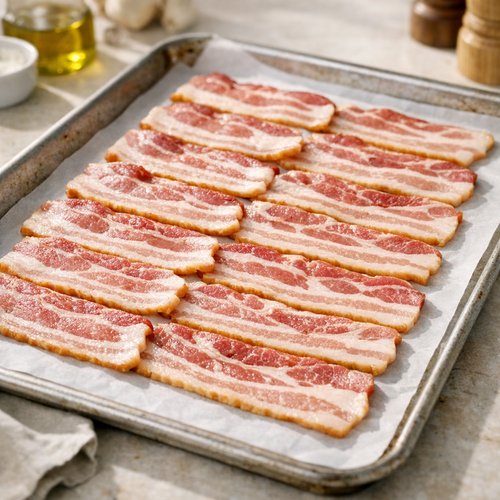
Step 1: Cook Your Bacon and Prepare Your Workspace
Start by laying 16 slices of applewood bacon on a large sheet pan lined with parchment paper. This creates zero cleanup for the bacon component—no splashing grease, no pan scrubbing. Bake at 400°F for 18-20 minutes until it’s crispy but not brittle. While the bacon cooks, gather all your ingredients and assemble them in order of use. Pull out eight storage containers and label them immediately with the date and contents. Don’t wait until after cooking; this takes 90 seconds now and prevents you from doing it while tired.
Once the bacon is done, transfer it to a paper towel-lined plate and let it cool completely. This takes about 8 minutes. Once cooled, crumble it into small pieces and set aside in a small bowl. The bacon loses no quality sitting for an hour and actually keeps better in a separate container than embedded in the finished burger.
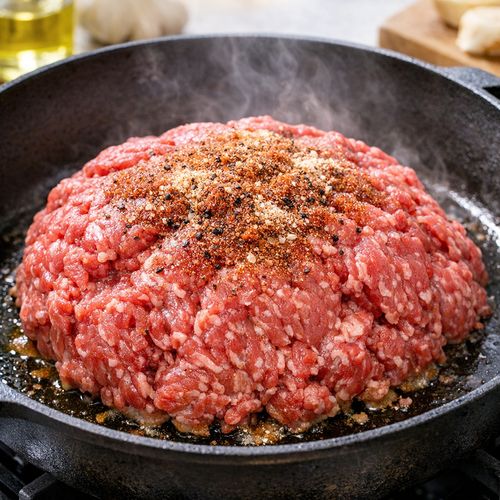
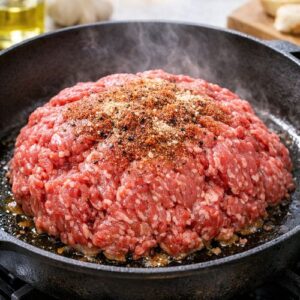
Step 2: Brown Your Ground Beef with Strategic Seasoning
Add 3 pounds of ground beef chuck to a large skillet or Dutch oven over medium-high heat. Don’t break it up immediately—let it sit undisturbed for 3 minutes to develop proper browning and deeper flavor. Then break it into crumbles and continue cooking, stirring occasionally, until no pink remains. This takes about 8-10 minutes total. Drain excess fat, reserving about 2 tablespoons in the pan for flavor.
Once the beef is cooked through, add 2 teaspoons kosher salt, 1 teaspoon black pepper, and 2 teaspoons taco seasoning. Stir thoroughly to distribute the seasonings evenly. Let this sit off heat for 2 minutes—this allows the flavors to set rather than cooking off immediately. The beef should smell noticeably more complex than when you started.
Step 3: Mix Your Cooling Cream Base
In a medium bowl, whisk together 1 cup sour cream, 1 cup ranch dressing, ½ cup salsa, juice from half your lime, and a pinch of cilantro if using. Make this 15 minutes before assembly so the flavors have time to meld. Taste and adjust seasoning—you want it slightly brighter than the ranch alone but still creamy and mild. This mixture holds beautifully for the entire week and actually tastes better after a day of flavors settling.

Transfer this to a separate container and refrigerate until assembly time. This prevents you from having to make this component later and ensures maximum flavor development.
Step 4: Warm Your Tortillas and Set Up Your Assembly Station
Wrap your 16 corn tortillas in a damp paper towel and microwave them for 60 seconds. This makes them pliable and much easier to work with—cold tortillas crack and are genuinely frustrating to assemble. Set them on your workspace in a stack covered with the paper towel to keep them warm.

Now arrange your workspace like a professional assembly line. Left to right: warm tortillas, cooked beef, pepper jack slices, cheddar cheese, bacon crumbles, pico de gallo, lettuce, and the cooling cream mixture in small bowls for easy scooping. This setup takes 3 minutes and prevents you from hunting for ingredients while your hands are full of beef.
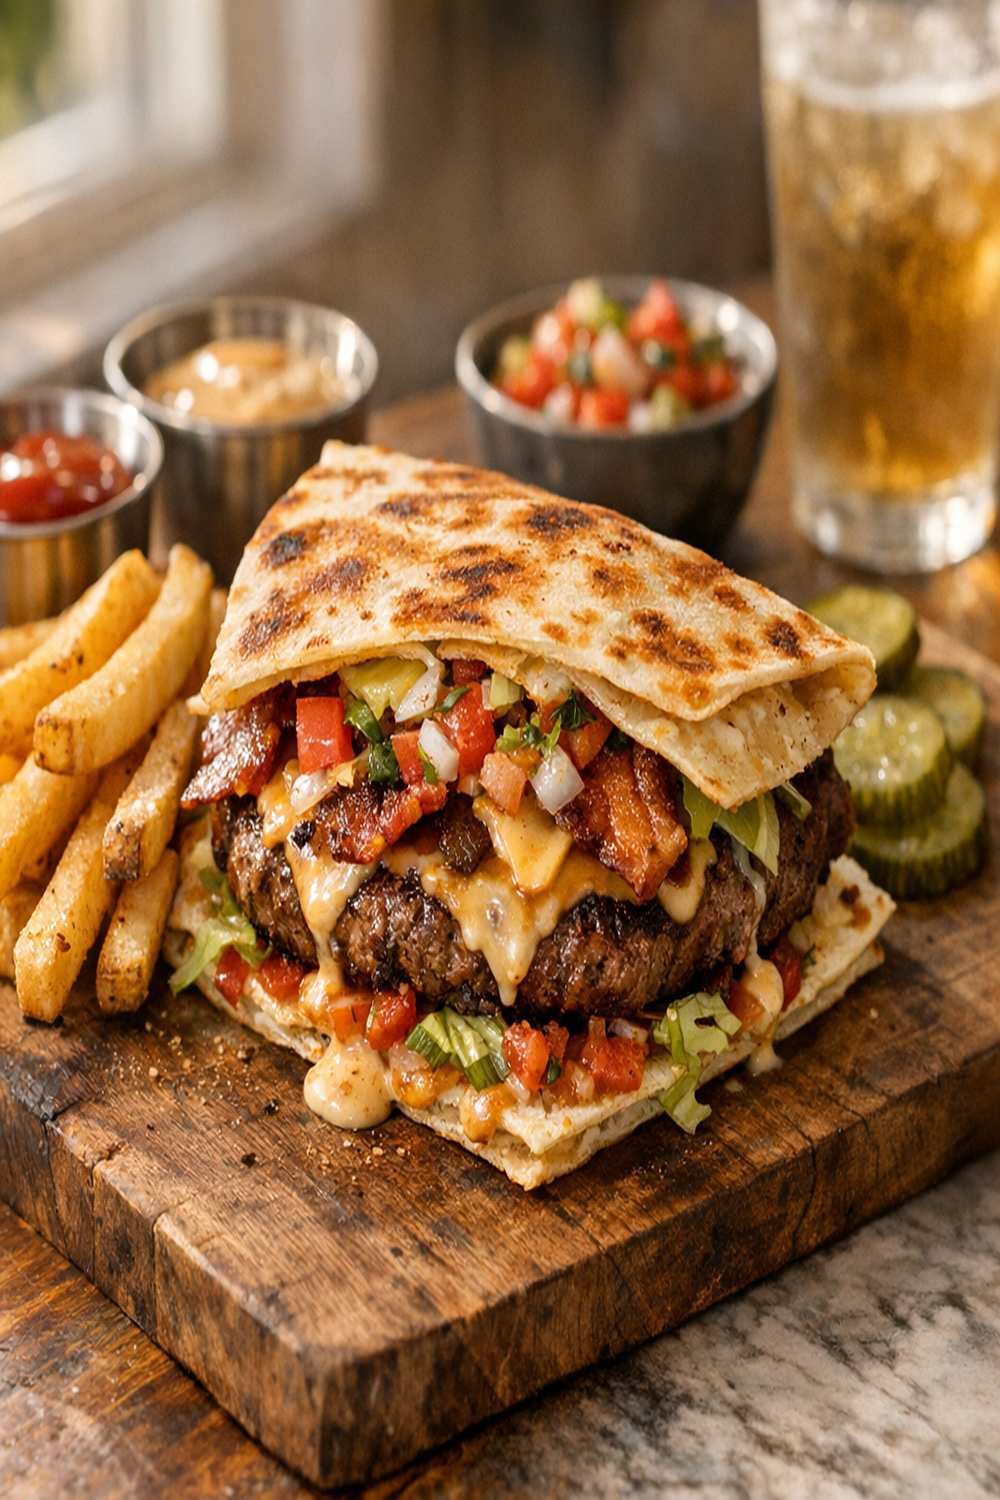
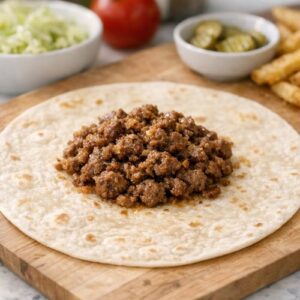
Step 5: Assemble Your Quesadilla Burgers Using the Two-Tortilla Method
Here’s where technique matters. Lay one warm tortilla flat on your workspace. Add approximately 3 ounces of cooked seasoned beef in the center (about the size of a hockey puck). Top this with one slice of pepper jack cheese and one slice of sharp cheddar cheese. These two cheeses together create the perfect melting ratio—the pepper jack adds spice and complexity while the cheddar adds richness and familiarity.

Now top with approximately 1 tablespoon of bacon crumbles, 2 tablespoons of pico de gallo, and ¼ cup of the crisp lettuce. Add a tablespoon of the cooling cream mixture directly on top. Now here’s the assembly secret: place a second tortilla on top and press down gently to seal everything together. This creates a self-contained package that’s actually portable and genuinely delicious to eat.
Repeat this process seven more times. You’re making eight complete burgers in this batch. Set each finished burger aside on a clean cutting board as you go. This entire assembly process takes approximately 12 minutes once you have your station set up properly.
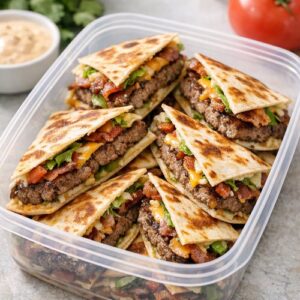
Step 6: Cut and Container Your Burgers for Maximum Freshness
Once all eight are assembled, cut each burger diagonally from corner to corner. This creates two triangular pieces that are easier to handle, look more appealing, and expose more of the gorgeous filling. This is a restaurant technique that makes homemade food feel special.

Place each pair of triangular halves into individual containers with parchment paper between them—this prevents them from sticking together and keeps them looking fresh. Add a small container of the remaining cooling cream mixture on the side of each container, and a separate small container with extra pico de gallo and lettuce. This allows you to customize freshness throughout the week.
Seal all containers immediately and refrigerate. Label with the date prepared and the date by which it should be consumed (five days from today). This labeling system takes 90 seconds and eliminates any guessing about freshness.
Storage and Organization System
- Glass meal prep containers with snap lids – These are worth the investment. They’re airtight, they don’t stain, they last for years, and most importantly, you can see exactly what’s inside at a glance. Plastic containers absorb flavors and oils over time, but glass maintains the integrity of your food. Size matters here: 32-ounce containers are perfect for one burger with sides.
- Parchment paper separation strategy – This prevents the burger halves from sticking together and keeps them looking fresh. More importantly, it means each burger is still attractive to eat five days later. Nobody wants to open their container to find a burger that looks like it’s been sitting for days—even if it hasn’t.
- Color-coded labels or a simple written system – I use removable labels on the front of each container with three pieces of information: preparation date, “eat by” date (five days out), and the meal type (Monday Lunch, Wednesday Dinner, etc.). This takes the guesswork out of what you’re eating and ensures you’re consuming older portions first. Spend 2 minutes creating this system on Sunday and save yourself decision fatigue all week.
- Separate containers for toppings and sauce – Keep the cooling cream mixture, extra pico de gallo, and fresh lettuce in separate small containers. This approach takes one extra minute per meal but dramatically extends the freshness of your finished burgers. The lettuce and tomato stay crisp longer when not directly embedded, and you can refresh the toppings on day four and five if needed.
How to Reheat Without Losing Quality
The biggest mistake people make with meal-prepped burgers is reheating them incorrectly and ending up with dried-out, rubbery results. Here’s exactly how I approach reheating throughout the week to maintain that fresh-made quality.
Monday through Wednesday (first three days) – These actually taste best at room temperature or cold. Remove your container from the refrigerator 15 minutes before you want to eat. The cool tortillas have excellent texture, the cheese is still melted and creamy, and the beef is at perfect eating temperature. If you absolutely need warmth, wrap the burger (without the separate toppings) in a damp paper towel and microwave for 45 seconds only. Any longer and the tortillas become tough.
Thursday and Friday (days four and five) – By now, a gentle reheating improves the eating experience. Unwrap the burger halves and place them on a microwave-safe plate. Cover loosely with a paper towel and microwave for 60-90 seconds, checking after 60 seconds. The residual heat will warm the beef and cheese without overdrying anything. Add your fresh toppings and cooling cream mixture after reheating, not before. This ensures crisp lettuce and fresh-tasting pico de gallo even when everything else has been refrigerated for days.
Stovetop method for the most restaurant-like results – If you have just 3 minutes, this is worth it. Heat a non-stick skillet over medium heat with a light coating of butter. Place the burger halves flat-side down in the pan and warm for 2 minutes per side. This creates a subtle crispness on the exterior while gently warming the interior. Your kitchen will smell incredible, and your burger will taste noticeably fresher than microwaved versions.
Can I Freeze Applebee’s Quesadilla Burger Recipe?
Absolutely. These freeze beautifully and are genuinely one of the best make-ahead items for anyone managing unpredictable schedules. Here’s my complete freezing protocol based on years of meal prep experience.
Freezing method: Assemble and freeze within four hours of cooking. Complete the entire assembly process (steps 1-6), then instead of refrigerating, place your labeled containers directly into your freezer. The sooner you freeze them after assembly, the better they maintain quality. Beef burgers freeze best within a window of when they’re genuinely fresh.
Maximum freezer storage: up to three months, though I genuinely recommend consuming within six weeks for best quality. After six weeks, the beef develops that subtle freezer-burn taste that no amount of reheating can completely overcome. Label with both the preparation date and a “use by” date so you’re never guessing.
Thawing strategy for best results – Move your burgers from the freezer to the refrigerator the night before you plan to eat them. This slow thaw takes about 12-14 hours and allows the moisture to redistribute through the meat rather than running off when you reheat. Never thaw at room temperature; this creates food safety concerns and uneven thawing. If you forgot to thaw, you can reheat directly from frozen—it just takes longer. Microwave for 2-3 minutes instead of 90 seconds, checking for even heating. You lose nothing in terms of quality; you simply gain a few minutes of reheating time.
Combination strategy I recommend – Make your full batch of eight on Sunday. Refrigerate four for the week ahead (days 1-5). Freeze the remaining four for use in weeks two and three. This gives you continuity without requiring a second cooking session until day 22, and it ensures you’re never eating anything older than necessary. It’s an incredibly efficient use of your time.
Nutrition Information
Per serving (one quesadilla burger with toppings): Approximately 520 calories, 28 grams protein, 32 grams fat (14 grams saturated), 35 grams carbohydrates, 4 grams fiber, 8 grams sugar, and 1,240 milligrams sodium. This is based on USDA data for ground beef, cheese, bacon, and tortillas, with slight variations depending on your exact brands. The protein-to-calorie ratio here is genuinely excellent—nearly 22% of your calories come directly from muscle-building protein.
From a nutritional standpoint, this meal prep approach does something remarkable for your week. You’re consuming consistent macronutrient ratios daily, which stabilizes blood sugar and prevents the afternoon energy crashes that lead to poor food choices. The combination of beef protein, bacon fat, and the modest carbohydrates from tortillas creates sustainable satiety—you’ll genuinely stay full through afternoon meetings or busy workdays.
The sodium level is notable; at approximately 1,240 milligrams per burger, these are moderately salted. If sodium is a concern for you, reduce the taco seasoning by half and rely on the salsa and pepper jack cheese for flavor complexity instead. You’ll lose nothing in terms of enjoyment; you’ll simply gain better alignment with your health goals.
Weekly nutritional summary from this meal prep approach – Consuming these five times throughout your week gives you approximately 140 grams of high-quality protein from beef and bacon alone. This supports muscle recovery, immune function, and hormone balance in ways that quick-grab meals simply cannot match. The consistent meal prep eating pattern also stabilizes your metabolism, making your body more efficient at using calories throughout the day.
What to Pair With Applebee’s Quesadilla Burger Recipe Throughout the Week
The beauty of these quesadilla burgers is that they’re genuinely complete meals on their own—protein, fat, and carbohydrates all present. But I understand that eating the same thing repeatedly, even when prepared differently, can feel monotonous. Here’s how I pair these throughout the week to create variety without requiring additional cooking.
- Monday Lunch: Pair with a cooling side salad featuring lime vinaigrette – Toss mixed greens with cilantro lime dressing and avocado. The cooling, acidic salad balances the richness of the burger beautifully and adds additional vegetables and healthy fats.
- Tuesday Snack/Light Dinner: Pair with simple black beans and Mexican rice – These reheat beautifully from a rice cooker and add fiber and additional plant-based protein. Prepare these in bulk on Sunday alongside your burgers.
- Wednesday Dinner: Pair with 3 Bean Baked Bean Recipe for double protein and genuine heartiness – This combination is genuinely hearty enough to satisfy anyone who needs serious sustenance. The beans add fiber that extends your satiety even further.
- Thursday Lunch: Pair with roasted vegetables and Mexican street corn seasoning – Roast zucchini, bell peppers, and red onion with cotija cheese and lime. These require zero active cooking time and add volume to your meal without adding excessive calories.
- Friday Dinner: Pair with fresh fruit and P.F. Chang’s Coleslaw Recipe for brightness and crunch – That creamy coleslaw contrasts beautifully with the burger, and fresh fruit provides natural sweetness and hydration that rounds out your week on a genuinely satisfied note.
Expert’s Nutritional Tip: Why Beef Chuck Is Non-Negotiable Here
As a registered dietitian, I want to highlight something that many people get wrong about ground beef in meal prep. An 80/20 blend (80% lean, 20% fat) isn’t indulgent—it’s nutritionally strategic. The fat content in chuck provides fat-soluble vitamins (particularly vitamins A, D, E, and K) that your body cannot absorb from the lean protein alone. More importantly, the fat carries flavor compounds that make these burgers genuinely delicious, which means you’ll actually eat them throughout the week instead of getting bored and abandoning your meal prep.
Ground sirloin (93% lean) will create burgers that taste dry, crumbly, and genuinely disappointing by Wednesday, no matter how well you reheat them. Ground chuck maintains moisture and texture throughout the week because the intramuscular fat remains distributed throughout the protein. This is real food science, not indulgence. Trust me on this; your meal prep success depends on beef that tastes genuinely good on day five, not just day one.
Make-Ahead Guide: Preparation Timeline
Friday evening (the night before) – Check your ingredients list and confirm you have everything on hand. Pull ground beef from the freezer to the refrigerator so it thaws overnight. You want it at room temperature before cooking—this creates more even browning. Label your containers with dates. Set a reminder on your phone to start cooking at your chosen Sunday time.
Sunday morning or early afternoon – Choose your preparation window. I recommend doing this between 10 AM and 1 PM when you have mental energy. Gather all ingredients on your counter. Preheat your oven and start your bacon. While bacon cooks, prepare your workspace. By the time you’re finishing the assembly, you’ll be moving efficiently and feeling momentum rather than fatigue.
Sunday evening – All containers are prepped, labeled, and refrigerated. Your kitchen is clean. You’re genuinely finished with cooking for the week. This mental shift—knowing that lunch and dinner are handled for the next five days—is genuinely valuable for your weekly stress levels.
Common Mistakes to Avoid When Making These in Bulk
Mistake #1: Over-seasoning the beef because you’re cooking a large batch – The instinct is to season heavily to ensure the flavor is noticeable, but remember that you’re tasting this same meal five times. What seems perfectly seasoned on day one can taste oversalted by day four. I recommend seasoning to 80% of what your instinct tells you. You can always add hot sauce, extra lime, or more taco seasoning at eating time, but you cannot remove salt after it’s been cooked into the beef.
Mistake #2: Assembling everything and then storing without separation – If your lettuce and pico de gallo are embedded directly into the burger on Sunday, they’ll be soggy, sad, and genuinely disappointing by Thursday. Store these components separately and add them at eating time. This takes one extra minute per meal and completely transforms the eating experience by day four and five.
Mistake #3: Skipping the labeling system because “you’ll remember” – You won’t. By Wednesday, you genuinely won’t remember when you made something. More importantly, someone else in your household might eat your containers thinking they’re fair game. Labels take 90 seconds and eliminate all confusion and conflict.
Mistake #4: Using pre-shredded cheese instead of slicing from blocks – Pre-shredded cheese contains anti-caking agents that prevent it from melting smoothly and evenly. It creates a slightly grainy texture that you’ll notice even when reheated. Slice your cheese from a block, or buy sliced cheese from the deli counter. The difference is genuinely noticeable and worth the extra 3 minutes of preparation time.
Seasonal Variations: Adapting This Recipe Year-Round
Summer version (June through August) – Increase the pico de gallo component and add fresh corn that you’ve charred in a hot skillet. Replace some of the ranch dressing with lime crema for brightness. Serve these completely cold straight from the refrigerator; the cooling cream mixture becomes genuinely refreshing rather than heavy. Add a cucumber and watermelon salad as your side pairing. The burger becomes lighter without becoming less satisfying.
Fall version (September through November) – Add roasted poblano peppers to your cheese layer. Replace the standard taco seasoning with a blend of cumin, smoked paprika, and a pinch of cinnamon for warmth. The cooling cream mixture can incorporate chipotle pepper for subtle smokiness. Pair these with roasted sweet potato rather than traditional rice or beans. The burger gains autumnal warmth without losing its essential identity.
Winter version (December through February) – This is where the burger becomes genuinely hearty. Add caramelized onions to your beef mixture (prepare these on Sunday alongside your burger prep). Use extra-sharp aged cheddar for deeper flavor. The cooling cream mixture becomes less prominent; instead, use warm queso fundido or a cilantro-lime crema. Pair these with a warm, comforting soup like this cozy soup for genuine winter satisfaction.
Spring version (March through May) – Emphasize fresh herbs. Add fresh cilantro and basil to your toppings. Use the lightest hand with the cooling cream mixture, allowing the fresh ingredients to shine. Incorporate pickled jalapeños for brightness and acidity. Pair with lighter salads featuring spring greens and fresh herbs. The burger becomes bright and forward-thinking rather than heavy and indulgent.
Applebee's Quesadilla Burger Recipe
Ingredients
Method
- Start by laying 16 slices of applewood bacon on a large sheet pan lined with parchment paper. This creates zero cleanup for the bacon component—no splashing grease, no pan scrubbing. Bake at 400°F for 18-20 minutes until it's crispy but not brittle. While the bacon cooks, gather all your ingredients and assemble them in order of use. Pull out eight storage containers and label them immediately with the date and contents. Don't wait until after cooking; this takes 90 seconds now and prevents you from doing it while tired. Once the bacon is done, transfer it to a paper towel-lined plate and let it cool completely. This takes about 8 minutes. Once cooled, crumble it into small pieces and set aside in a small bowl. The bacon loses no quality sitting for an hour and actually keeps better in a separate container than embedded in the finished burger.

- Add 3 pounds of ground beef chuck to a large skillet or Dutch oven over medium-high heat. Don't break it up immediately—let it sit undisturbed for 3 minutes to develop proper browning and deeper flavor. Then break it into crumbles and continue cooking, stirring occasionally, until no pink remains. This takes about 8-10 minutes total. Drain excess fat, reserving about 2 tablespoons in the pan for flavor. Once the beef is cooked through, add 2 teaspoons kosher salt, 1 teaspoon black pepper, and 2 teaspoons taco seasoning. Stir thoroughly to distribute the seasonings evenly. Let this sit off heat for 2 minutes—this allows the flavors to set rather than cooking off immediately. The beef should smell noticeably more complex than when you started.
- In a medium bowl, whisk together 1 cup sour cream, 1 cup ranch dressing, ½ cup salsa, juice from half your lime, and a pinch of cilantro if using. Make this 15 minutes before assembly so the flavors have time to meld. Taste and adjust seasoning—you want it slightly brighter than the ranch alone but still creamy and mild. This mixture holds beautifully for the entire week and actually tastes better after a day of flavors settling. Transfer this to a separate container and refrigerate until assembly time. This prevents you from having to make this component later and ensures maximum flavor development.

- Wrap your 16 corn tortillas in a damp paper towel and microwave them for 60 seconds. This makes them pliable and much easier to work with—cold tortillas crack and are genuinely frustrating to assemble. Set them on your workspace in a stack covered with the paper towel to keep them warm. Now arrange your workspace like a professional assembly line. Left to right: warm tortillas, cooked beef, pepper jack slices, cheddar cheese, bacon crumbles, pico de gallo, lettuce, and the cooling cream mixture in small bowls for easy scooping. This setup takes 3 minutes and prevents you from hunting for ingredients while your hands are full of beef.

- Here's where technique matters. Lay one warm tortilla flat on your workspace. Add approximately 3 ounces of cooked seasoned beef in the center (about the size of a hockey puck). Top this with one slice of pepper jack cheese and one slice of sharp cheddar cheese. These two cheeses together create the perfect melting ratio—the pepper jack adds spice and complexity while the cheddar adds richness and familiarity. Now top with approximately 1 tablespoon of bacon crumbles, 2 tablespoons of pico de gallo, and ¼ cup of the crisp lettuce. Add a tablespoon of the cooling cream mixture directly on top. Now here's the assembly secret: place a second tortilla on top and press down gently to seal everything together. This creates a self-contained package that's actually portable and genuinely delicious to eat. Repeat this process seven more times. You're making eight complete burgers in this batch. Set each finished burger aside on a clean cutting board as you go. This entire assembly process takes approximately 12 minutes once you have your station set up properly.
- Once all eight are assembled, cut each burger diagonally from corner to corner. This creates two triangular pieces that are easier to handle, look more appealing, and expose more of the gorgeous filling. This is a restaurant technique that makes homemade food feel special. Place each pair of triangular halves into individual containers with parchment paper between them—this prevents them from sticking together and keeps them looking fresh. Add a small container of the remaining cooling cream mixture on the side of each container, and a separate small container with extra pico de gallo and lettuce. This allows you to customize freshness throughout the week. Seal all containers immediately and refrigerate. Label with the date prepared and the date by which it should be consumed (five days from today). This labeling system takes 90 seconds and eliminates any guessing about freshness.
Nutrition
Tried this recipe?
Let us know how it was!FAQs
How many days can I safely store these in my refrigerator?
These maintain optimal quality for five full days when stored properly in airtight containers at 40°F or below. By day six, the beef begins developing that subtle off-flavor that cooking cannot completely eliminate. This is the beauty of making exactly eight burgers on Sunday—you use them by Friday evening, never pushing into day six. If you want meals beyond day five, freeze the remaining burgers instead of refrigerating them.
Can I make these with ground turkey or chicken instead of beef?
You can, but the eating experience will be substantially different. Chicken and turkey are significantly leaner and don’t contain the same intramuscular fat that keeps beef burgers moist and flavorful through the week. If you choose poultry, increase your fat component by mixing in a tablespoon of melted butter or olive oil per pound of meat. Additionally, add more of the cooling cream mixture and fresh toppings to compensate for the reduced fat content. The result will still be good, but it will genuinely taste different than the beef version.
What if I don’t like pepper jack cheese?
The combination of pepper jack and sharp cheddar is genuinely strategic—the pepper jack adds a subtle heat and spice while the cheddar provides the primary cheesy flavor. If you dislike pepper jack, replace it with Monterey Jack or even white cheddar for milder flavor. Use the same amount (one slice plus ¼ cup shredded per burger). You’ll lose the subtle pepper note, but you’ll gain exactly what you prefer in your cheese. Customize this to your actual taste preferences; there’s no point in meal prepping something you don’t genuinely enjoy eating.
How do I prevent the tortillas from becoming tough after a few days of storage?
This happens when tortillas dry out. Store your completed burgers with the parchment paper between the halves, then wrap the entire container in a damp paper towel before sealing it. The humidity prevents the tortilla exterior from hardening. Additionally, keep the cooling cream mixture in a separate container rather than embedded in the burger; this prevents the tortillas from becoming soggy while also maintaining their texture through the week. It’s a balance between moisture and staleness that proper storage technique completely solves.
Is there a way to meal prep these if I have a small freezer with limited space?
Absolutely. Make your full batch of eight, then refrigerate four for the week ahead and immediately freeze only the other four. This uses minimal freezer space (just four containers) while still giving you continuous meals through week two and three. Alternatively, make only four burgers at a time if your space is extremely limited. You’ll prepare twice as often, but you’ll maintain fresh quality and use minimal freezer real estate. There’s no rule that says you must cook all eight at once; scaling down to your actual storage capacity is genuinely practical and totally fine.
More Meal Prep Recipes You’ll Love
- Korean Beef Tacos – Dish Journal – Similar beef-forward meal prep with completely different flavor profile and assembly; great for mixing up your weekly rotation
- Instant Pot Olive Garden Zuppa Toscana Copycat Recipe – Dish Journal – Hearty soup base that reheats beautifully and pairs perfectly alongside your burger week
- this cozy soup